How to use Elements
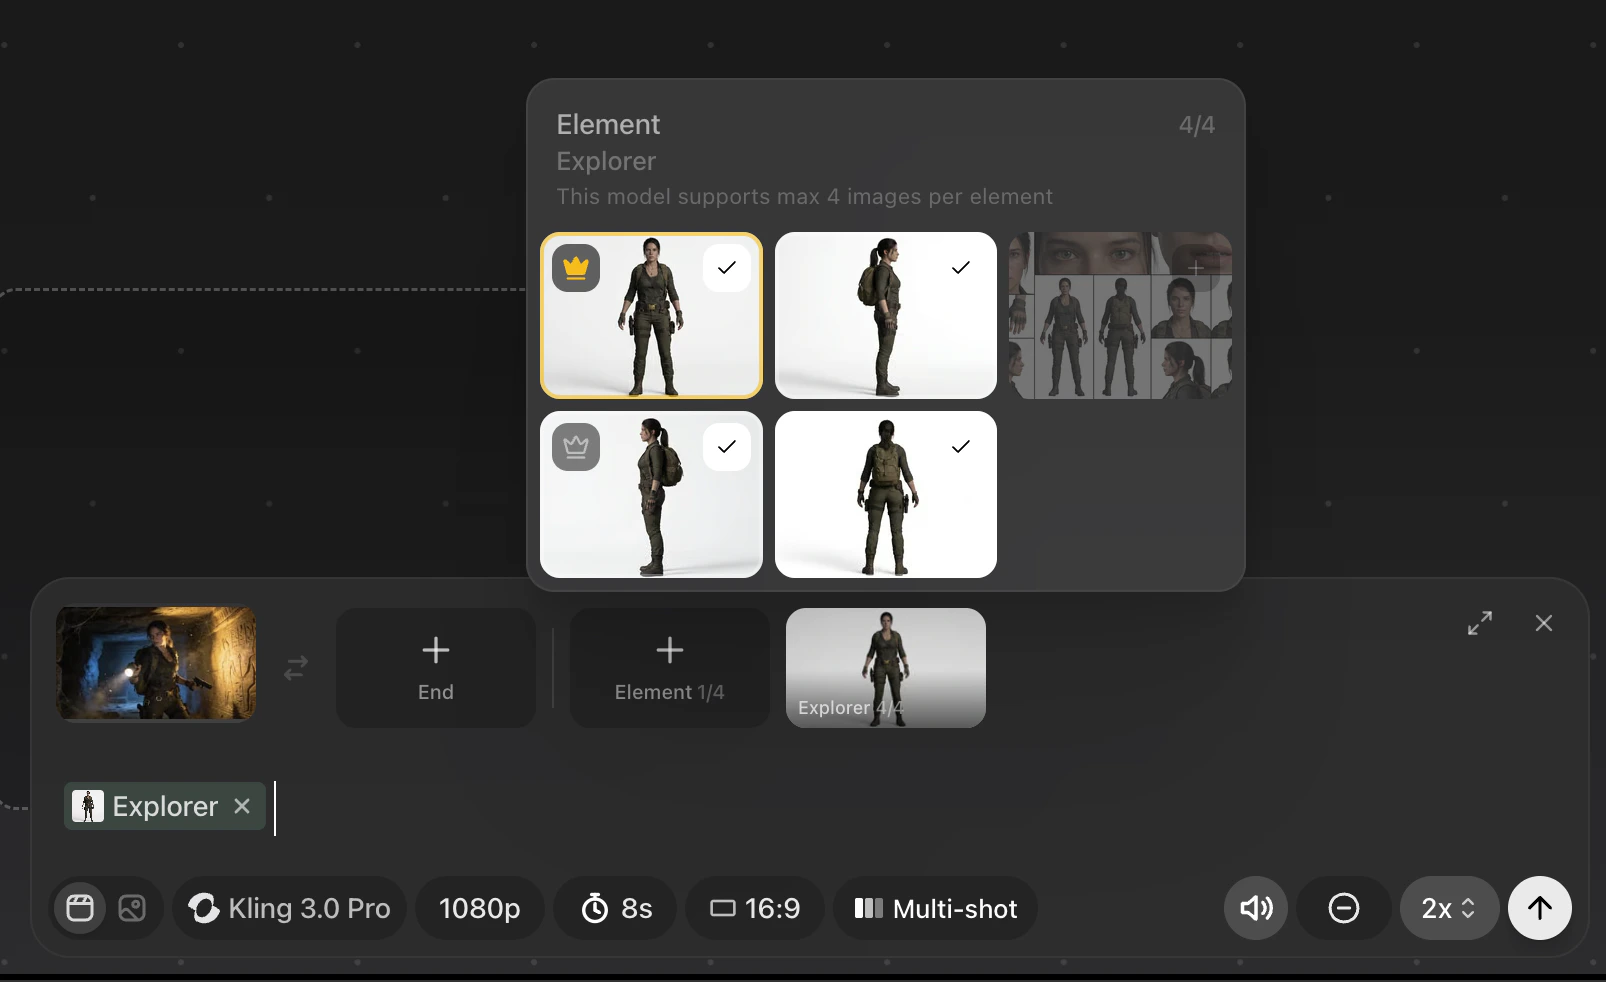
Elements are only available once you have added a Start Frame to your prompt. Only Characters and Props can be used as Elements. Elements are used to keep consistency within your final output by combining several different view angles of an asset that is visible in your Start and End Frames.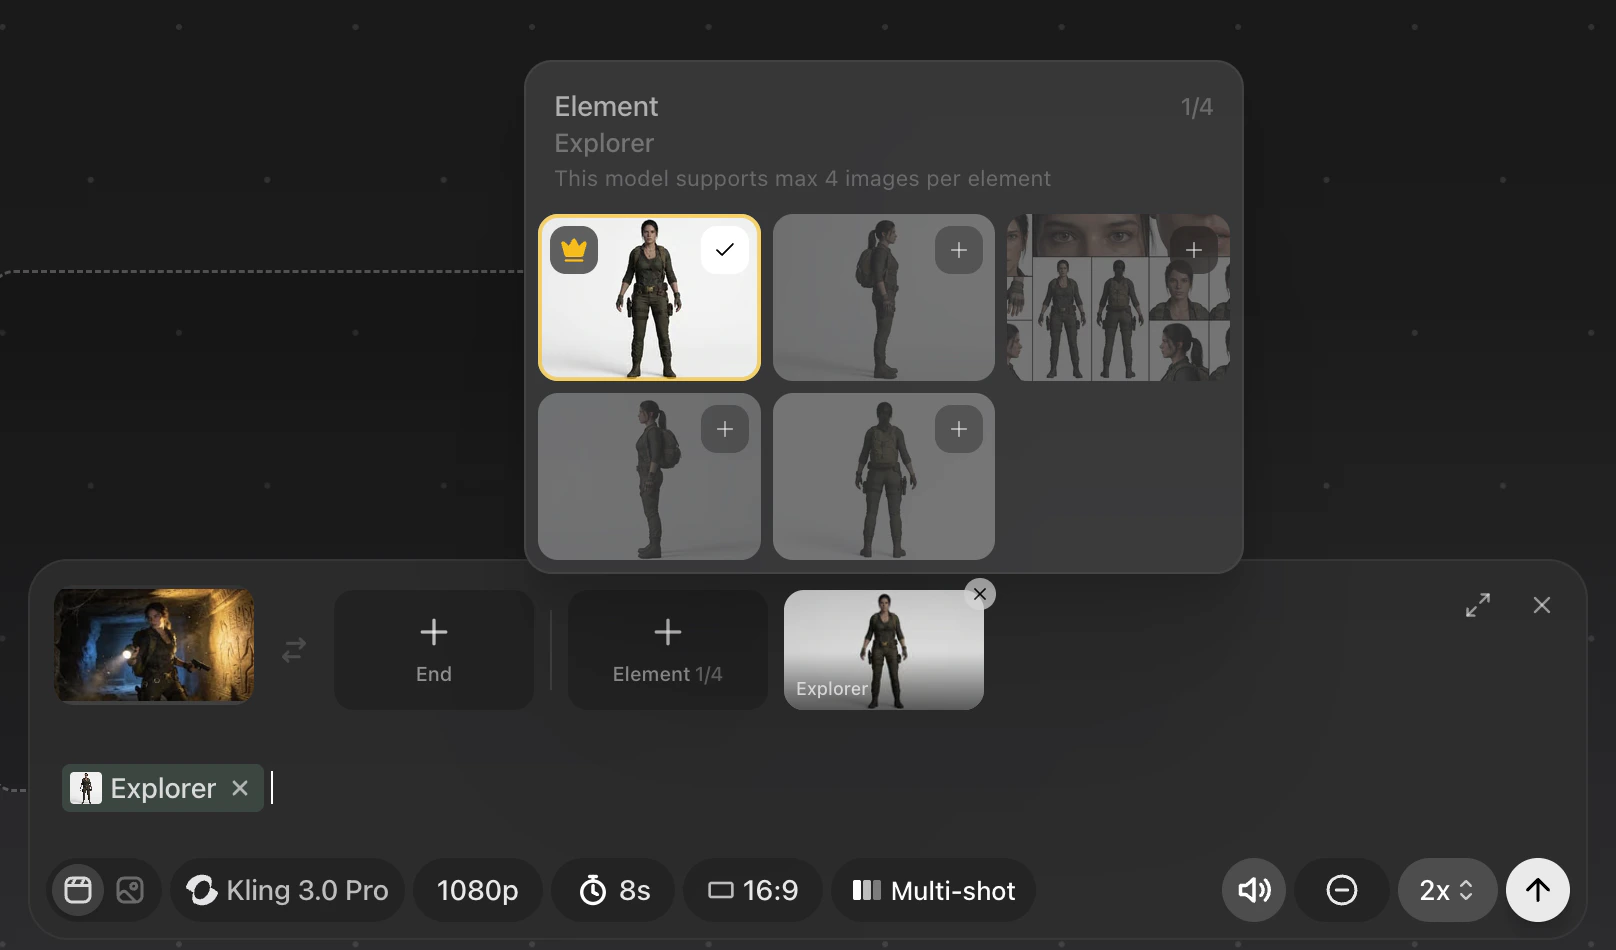
- For elements to be most effective you want to have several different saved character views.
- Each element must have at least 1 image but can use 4 images total.
- You can use 4 Elements per prompt.
- Use the element naturally in the prompt text as you would with a standard Character or Prop reference.
- Your primary element asset must always be a front facing character image, your secondary reference assets within an element should be different angles of the same Character or Prop.
- Your secondary reference elements can also be close up shots of specific details that you need to maintain consistency in the final output video.
- Once you choose your Element it will add as a @ref in the prompt box text. You can also add an element by typing the @name.
- Once you have added an element be sure to click on the Element image in the prompt box top shelf to choose the images you want to use in the Element.
How to use Multi-Shot
- Multi-Shot supports using your Elements as well as standard image references.
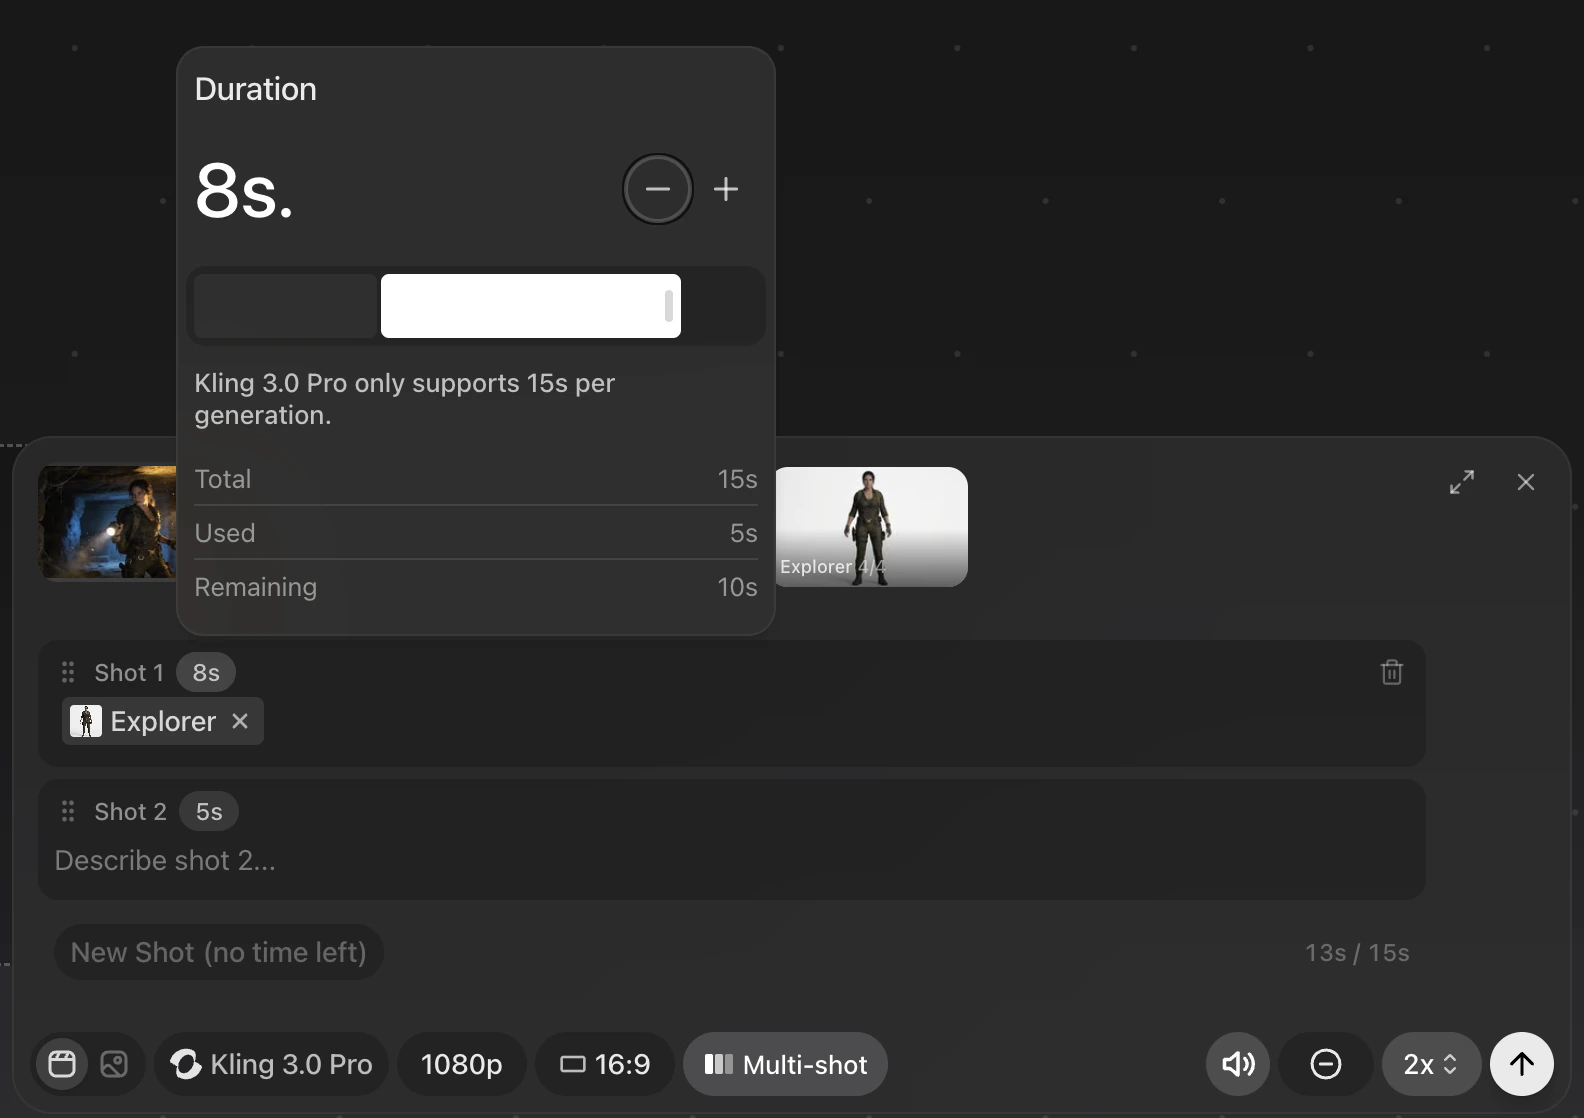
- Add more shots by clicking the New Shot button.
- Change the duration of each shot by clicking the #s beside the ‘shot #’
- Shot min duration is 3 seconds, Max duration is 15s