


When to use it
Use the timeline for fast, in-canvas structuring: ordering shots and assigning files as you generate. Move to Production for metadata, status tracking, or bulk planning.Shotlists
A project can hold multiple Shotlists: each a complete, independent set of sequences and shots. The timeline always shows whichever one is active, and so does Production; switching one switches the other.- Switch: open the dropdown next to your project name, beside it on canvas or in any Production view. Same picker either way.
- Create: click New in the popover. Starts with one empty sequence and one empty shot, same as a brand-new project.
- Duplicate: from a Shotlist’s ⋯ menu. Copies the sequences, shots, and their assigned takes. (Duplicating a single sequence, below, copies structure only.)
- Rename or Delete: same ⋯ menu. Delete is disabled once you’re down to your last Shotlist.
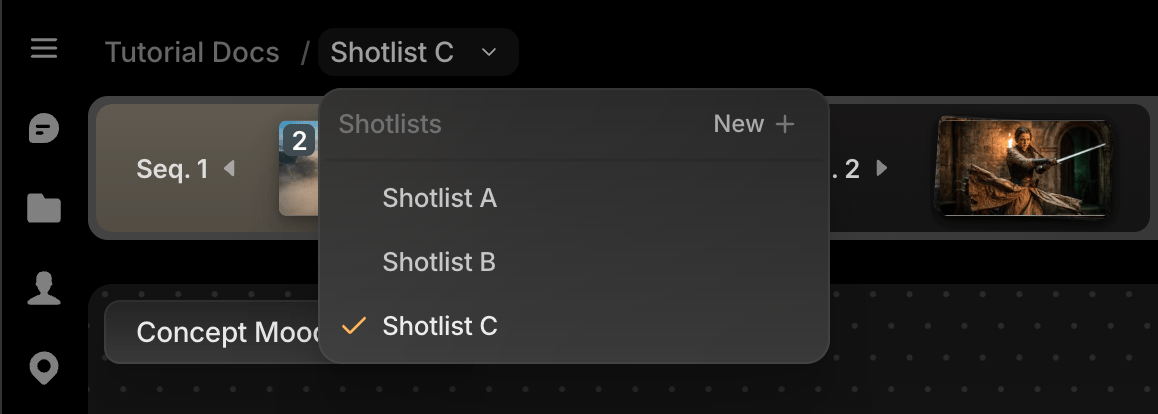
Every new project starts with one Shotlist. New ones are named sequentially: Shotlist A, Shotlist B, and so on.
Add a sequence or shot
- Add a sequence: click New sequence at the end of the timeline; this also creates its empty first shot.
- Add a shot to an existing sequence: click the + at the end of that sequence’s bar, then choose Add shot or Add multiple shots.
Assign files to shots from the canvas
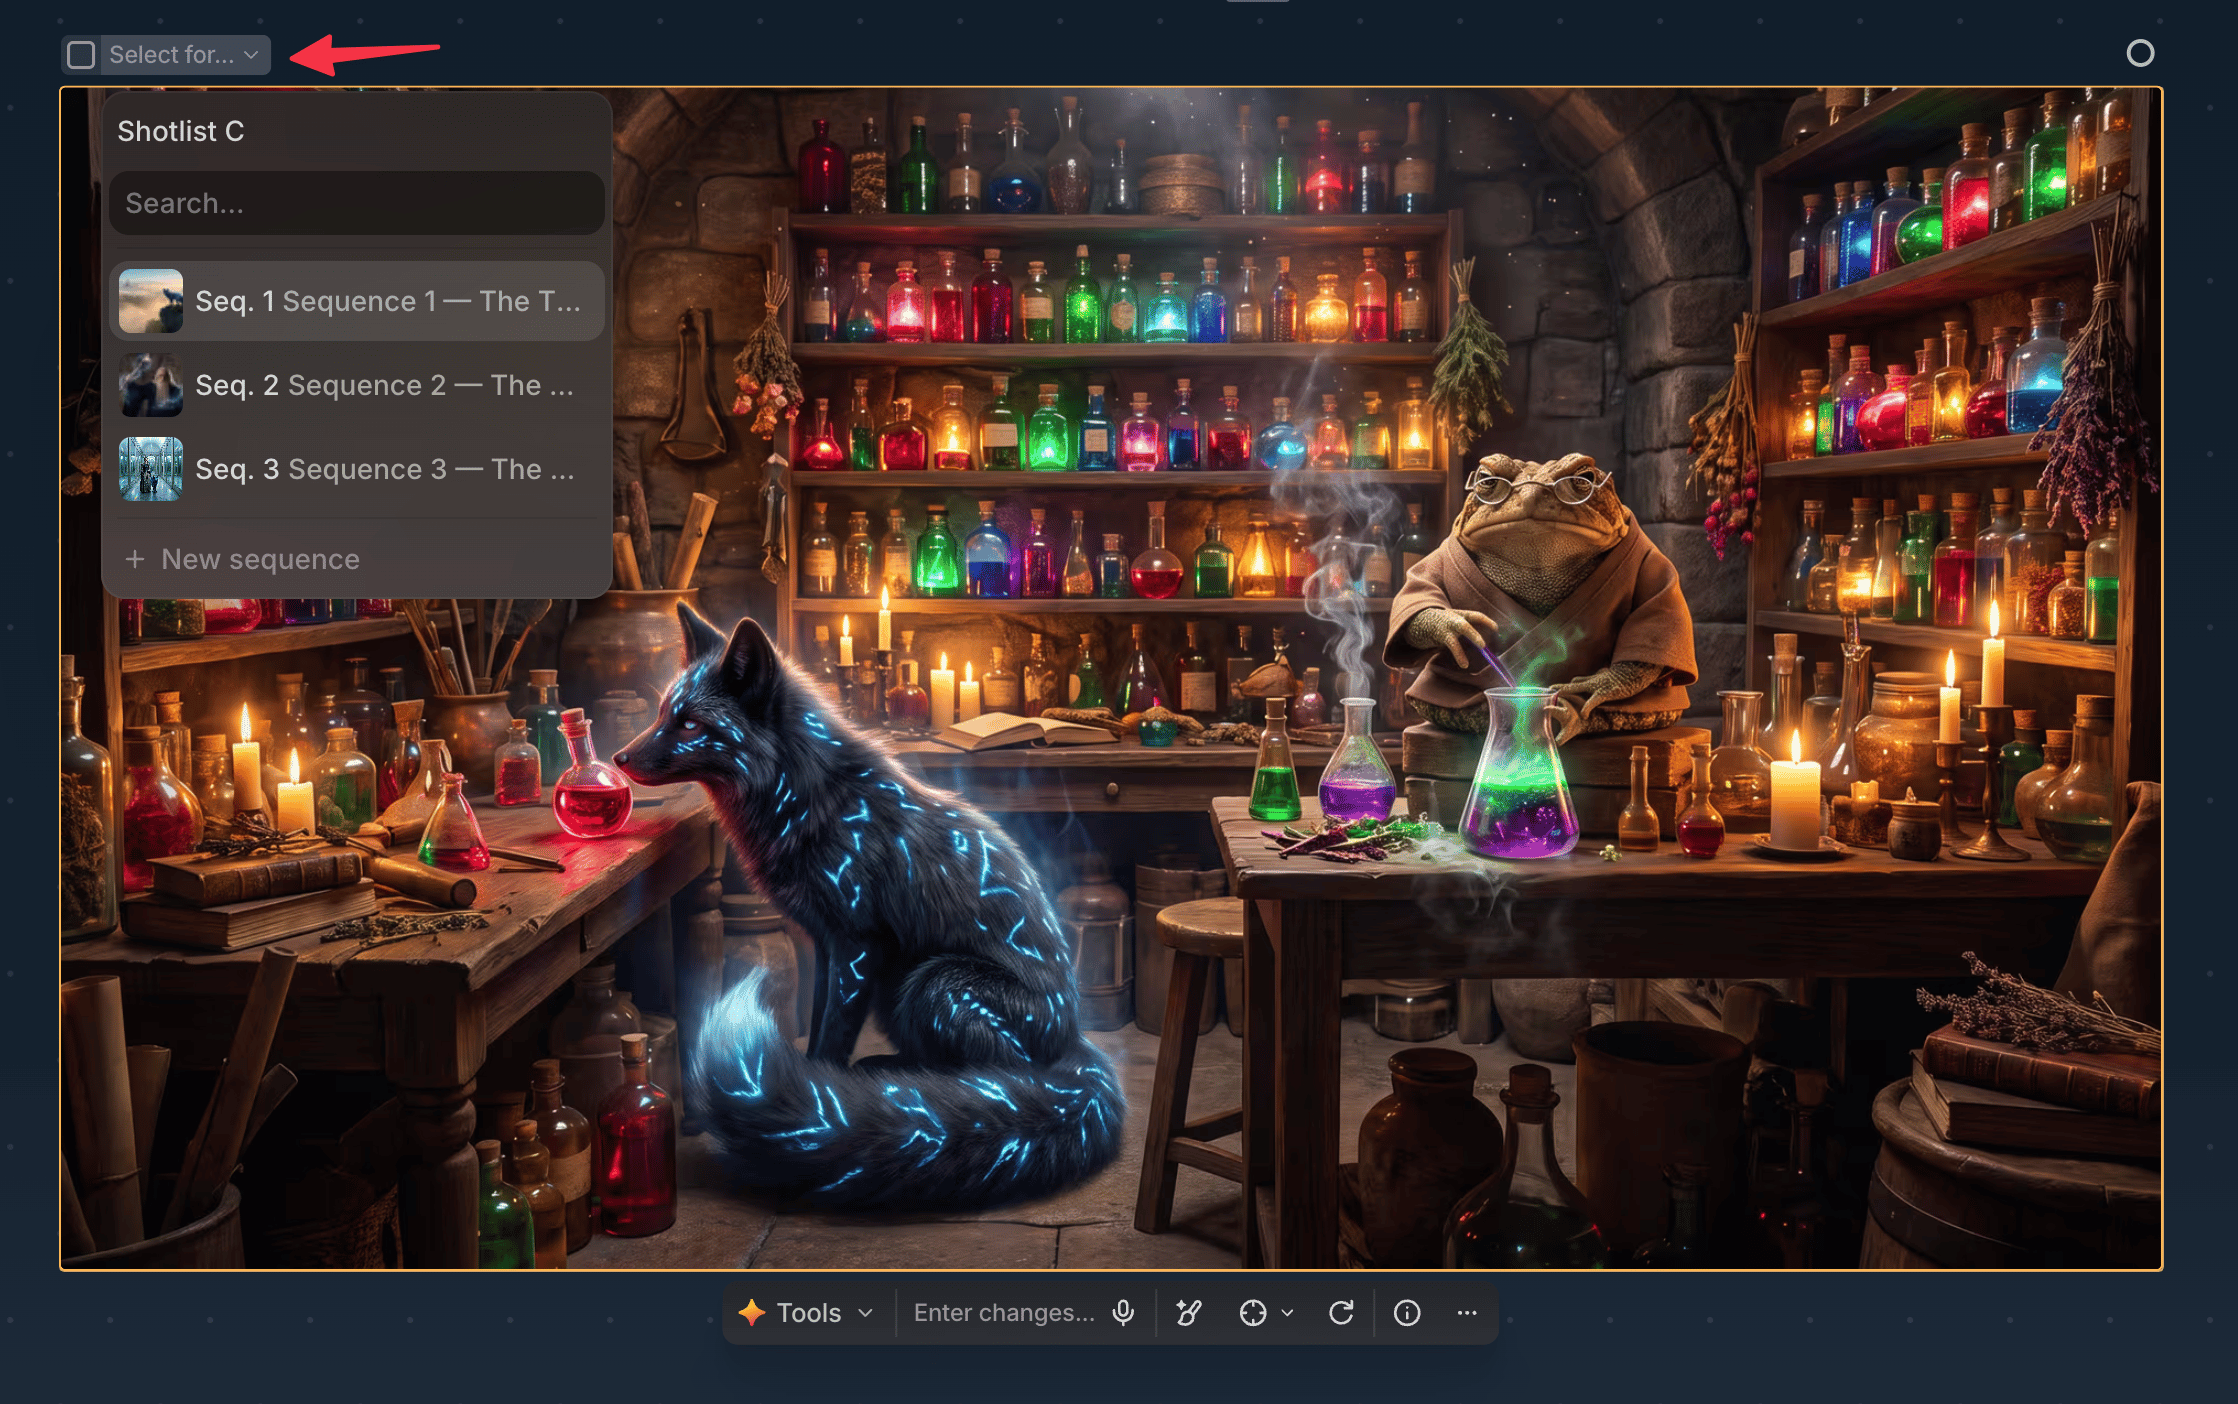
The timeline needn’t be open to assign a file: every canvas file has a Select for control floating above it.- Check the box on the file to assign or unassign it from the active shot.
- Open Select for to search any project sequence; choose one to see its shots, then a shot to assign the file to.
- Choose New sequence from that dropdown to create one with an empty first shot, then pick that shot to assign the file.
- After choosing a sequence, choose New shot at the bottom of its shot list to create and assign one.
Reorder and remove
- Reorder shots: drag a shot to a new position in its sequence.
- Remove a take from its shot: right-click the shot (or, with multiple takes, one in its hover popover) and choose Remove Take. The take stays on canvas, just unassigned.
- Delete a shot: right-click it and choose Delete Shot. Takes become unassigned, not deleted; only the shot leaves the sequence.
- Open Shot Info: hover the shot, click the Info icon in its takes popover, for a sidebar with Details, References, and Takes tabs.
- Find on canvas: right-click a shot (or a take in its popover) and choose Find on canvas to jump straight to that file, switching canvas or sequence if needed. Double-clicking a take in the popover does the same.
Shots can’t be dragged between sequences. Instead, assign a shot’s takes to a shot in the new sequence via Select for.
Manage a sequence
Right-click a sequence title to open sequence actions:- Expand / Collapse
- Duplicate
- Export sequence
- View details (also where you rename the sequence)
- Copy link
- Collapse all / Expand all
- Delete sequence