Key parts of the canvas
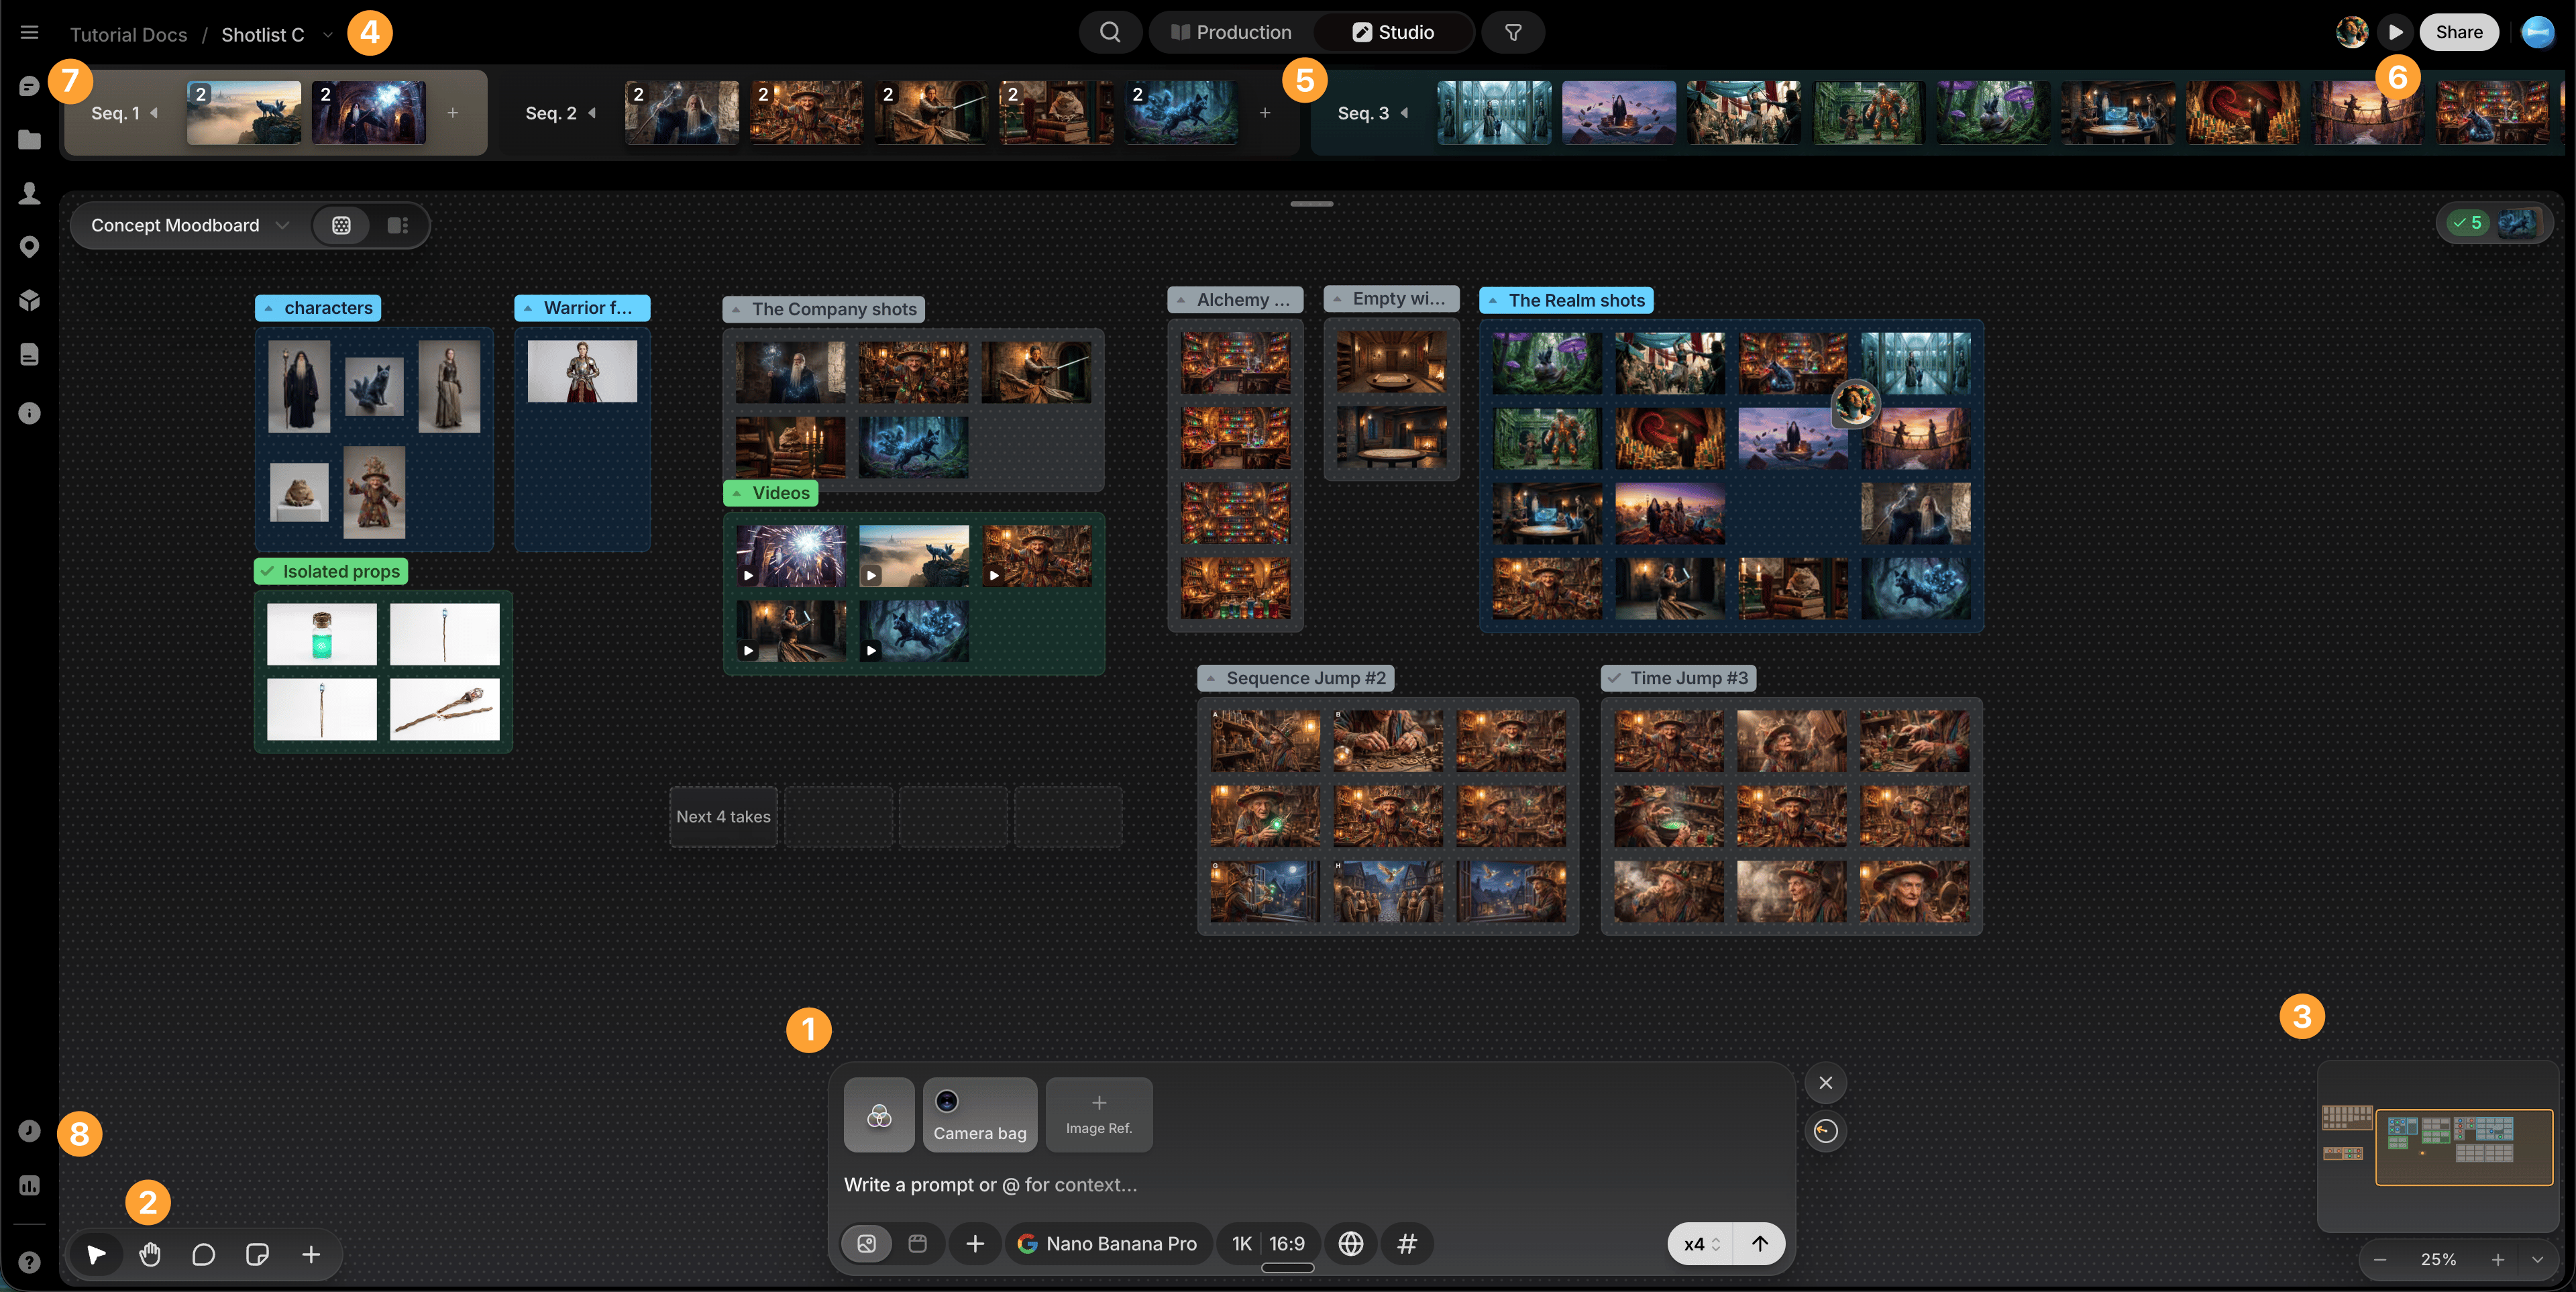
- Prompt box (bottom center): generate images and videos.
- Toolbar (bottom left): Cursor, Hand, Comments, and Sticky note tools, plus an Add button for bringing in files (Upload or Uploads).
- Minimap (lower right): zoom and jump around large canvases. Shows colored markers for groups, sticky notes, and tagged files; drag its edges to resize it.
- Sequence Timeline (top): assigns files to shots.
- Production / Studio switcher: Studio is this canvas; Production is the management side, with three synced views (Shotlist, Storyboard, Kanban).
- Play (upper right, beside Share): preview a sequence’s shots back to back in a mini playback window.
- Comments sidebar: review discussion history.
- History sidebar: every image ever created or imported, filterable by user. Drag one back onto canvas to restore it.
Files view
Every canvas has two faces: Canvas view, the surface itself, and Files view, a feed of everything ever generated or uploaded on that canvas. Switch between them from the tabs on the canvas pill in the top-left.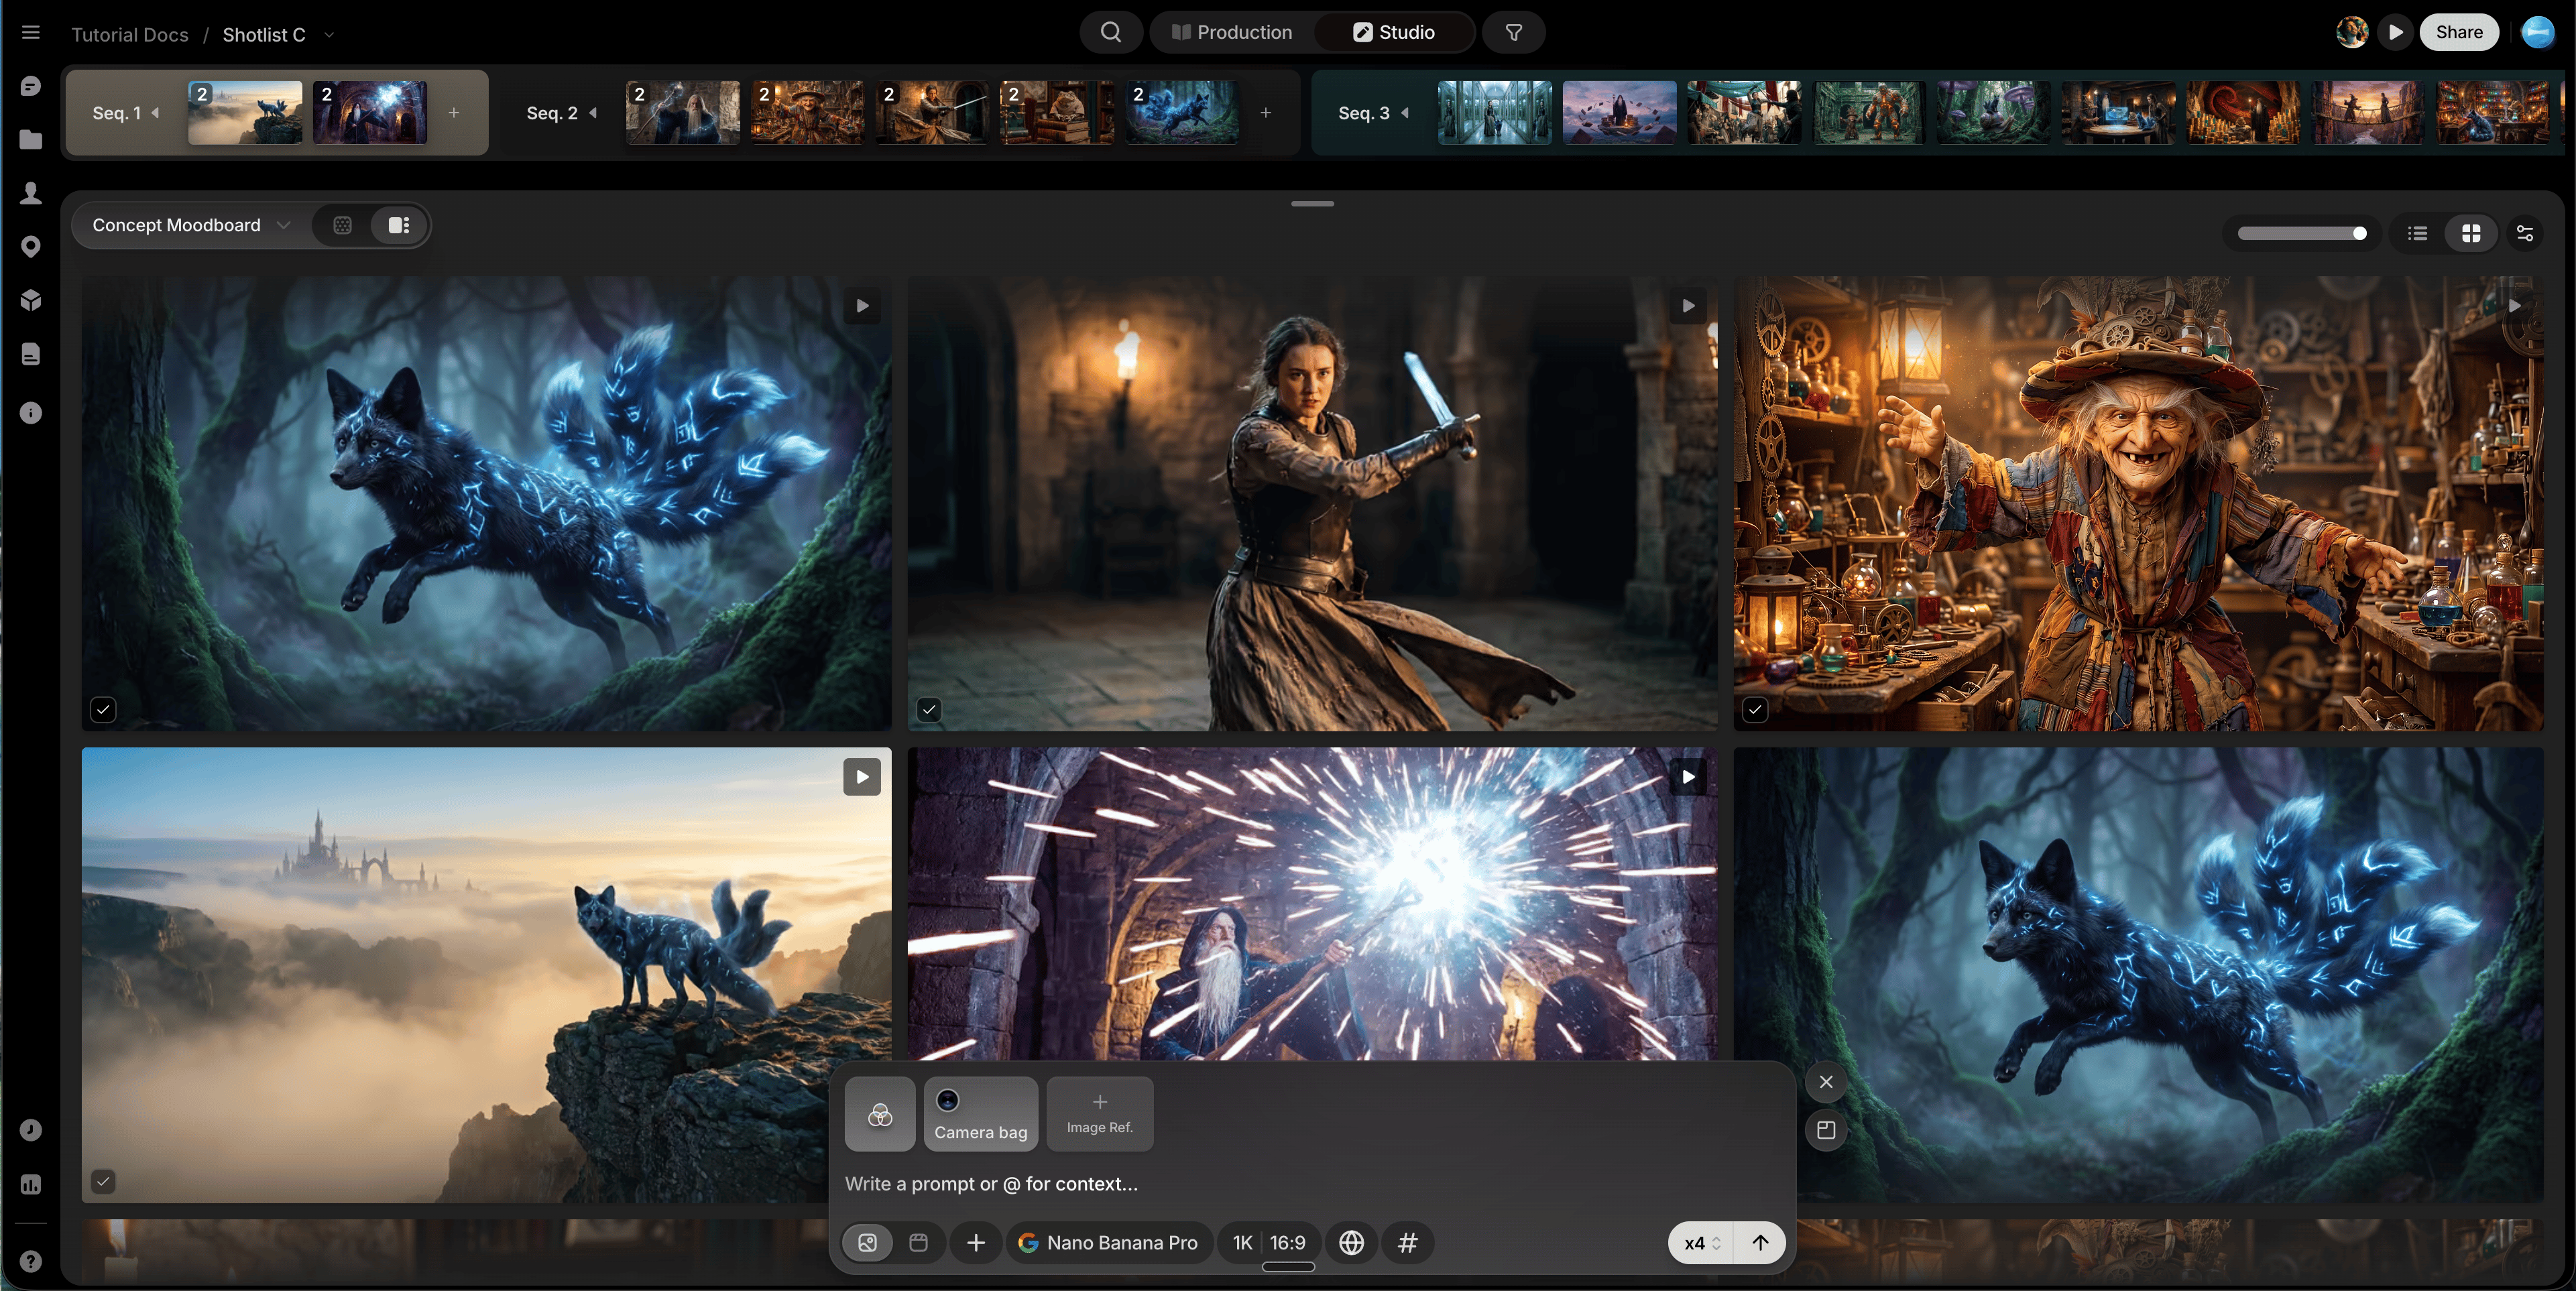
- Place on canvas, or don’t: hover a file for its Place on canvas / Remove from canvas toggle, bottom-left of the tile. Placing shows a toast with a Go to button that jumps straight to the file on canvas; removing takes it off the canvas but keeps it here.
- Place on canvas by default: one switch in Generation settings (top right), on out of the box. Turn it off and Files view becomes a staging area: generate freely, review the batch here, and place only what’s worth keeping.
- List or Grid: filter by Type, Model, Resolution, or Aspect ratio from the Filters control.
- List layout: generations grouped by date, then prompt, with creator, timestamp, prompt text, and settings on each row.
- Grid layout: a dense gallery with an adjustable tile size.
Sticky notes
Sticky notes are for quick, freeform notes that live on the canvas itself, separate from the threaded, timestamped discussion in Comments. Click the sticky note tool in the bottom-left toolbar (or press N) and click the canvas to place one; it enters edit mode and grows as you type.- Format text: select text inside a note for Bold, Italic, Strikethrough, and Bullet list.
- Change color or size: open a note’s ⋯ menu for six colors and three text sizes.
- Resize: drag a corner handle; notes scale proportionally.
Comments
Click the comment tool in the bottom-left toolbar to leave feedback directly on the canvas. See Comments for the full drawing and threading toolkit.Work with collaborators
Follow another person’s cursor by clicking their avatar (upper right), or send a short live canvas message by typing/.
Multiple canvases
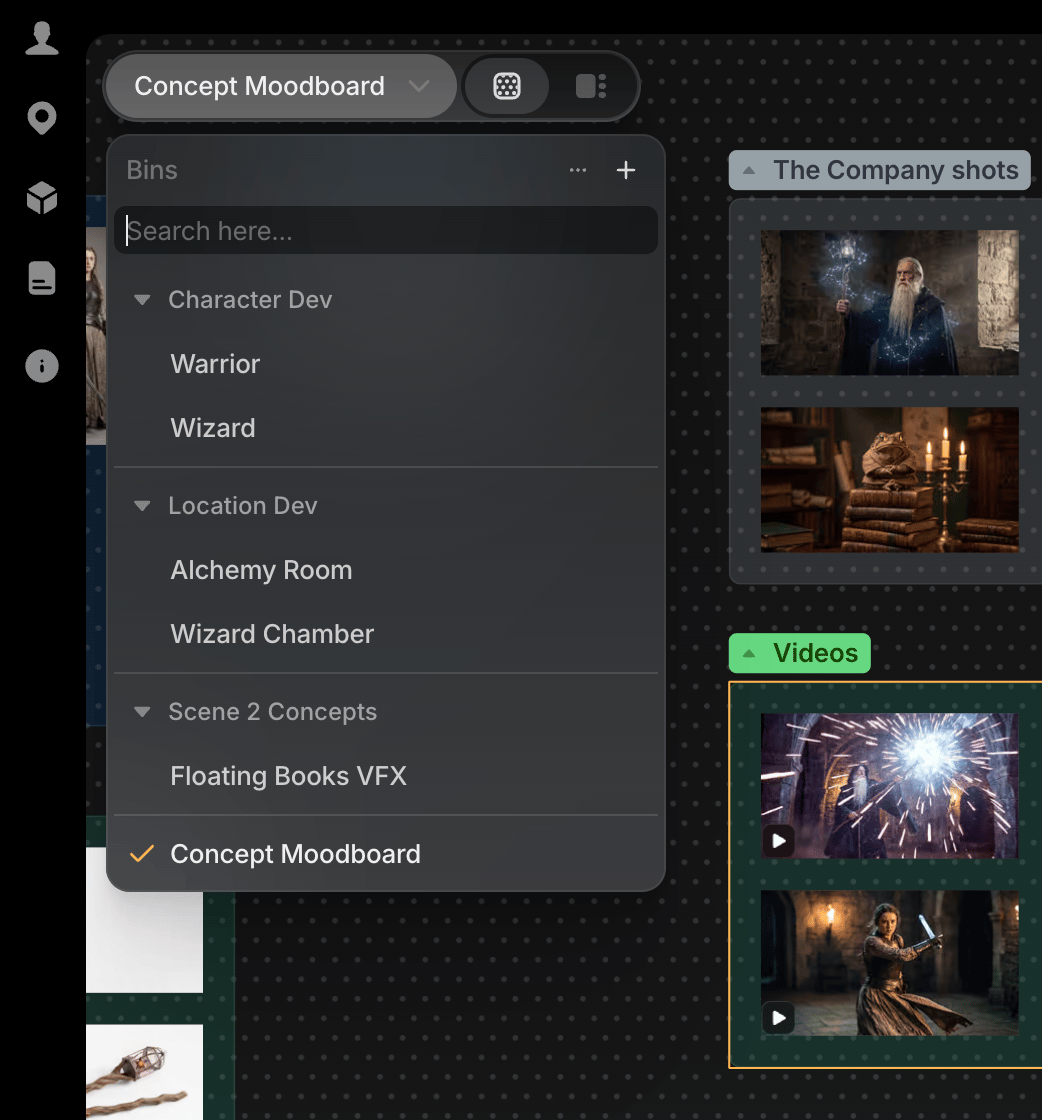
As a project grows, one canvas often isn’t enough for every storyline, department, or exploration pass. Canvases belong to the project, not one sequence, so create or switch between them from the top-left canvas picker (its header reads Bins: the bins hold your canvases). Once you have several, group them into named sections:- Create a section: from the picker’s ⋯ menu, choose Create section, or right-click a canvas and choose Move to → Create section to start one with that canvas included.
- Move a canvas into a section: right-click it (or open its ⋯ menu) and choose Move to. No drag-and-drop for individual canvases; only sections drag-reorder.
- Rename or delete a section from its own ⋯ menu.
- Select multiple canvases with Shift-click or Cmd/Ctrl-click, then right-click for bulk Move to or Delete.
- Search the picker by canvas or section name.
- Sort canvases Alphabetical or Recently used, from the picker’s ⋯ menu.