> ## Documentation Index
> Fetch the complete documentation index at: https://docs.preview.io/llms.txt
> Use this file to discover all available pages before exploring further.
# Prompt Box
> Generate images and videos with your favorite models, using references and saved files, in the prompt box.
Can't find the prompt box? It's hidden whenever [Preview Agent](/preview/agent)'s chat panel is open, since the two can't be open at the same time. Close the agent to bring it back.
## Generate
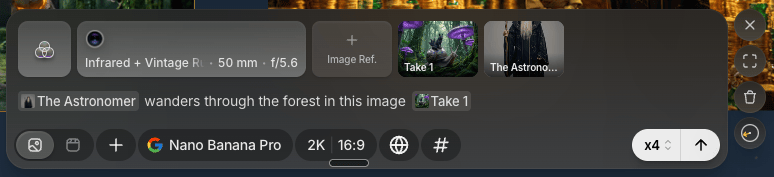 Write a prompt in the prompt box at the bottom of the canvas, then set:
* Model
* Resolution and aspect ratio
* Duration and audio on/off (video)
* Internet on/off
* Seed
* Number of outputs
Hover the generate button to check credit cost before running a job. See [Project Analytics](/preview/project-analytics).
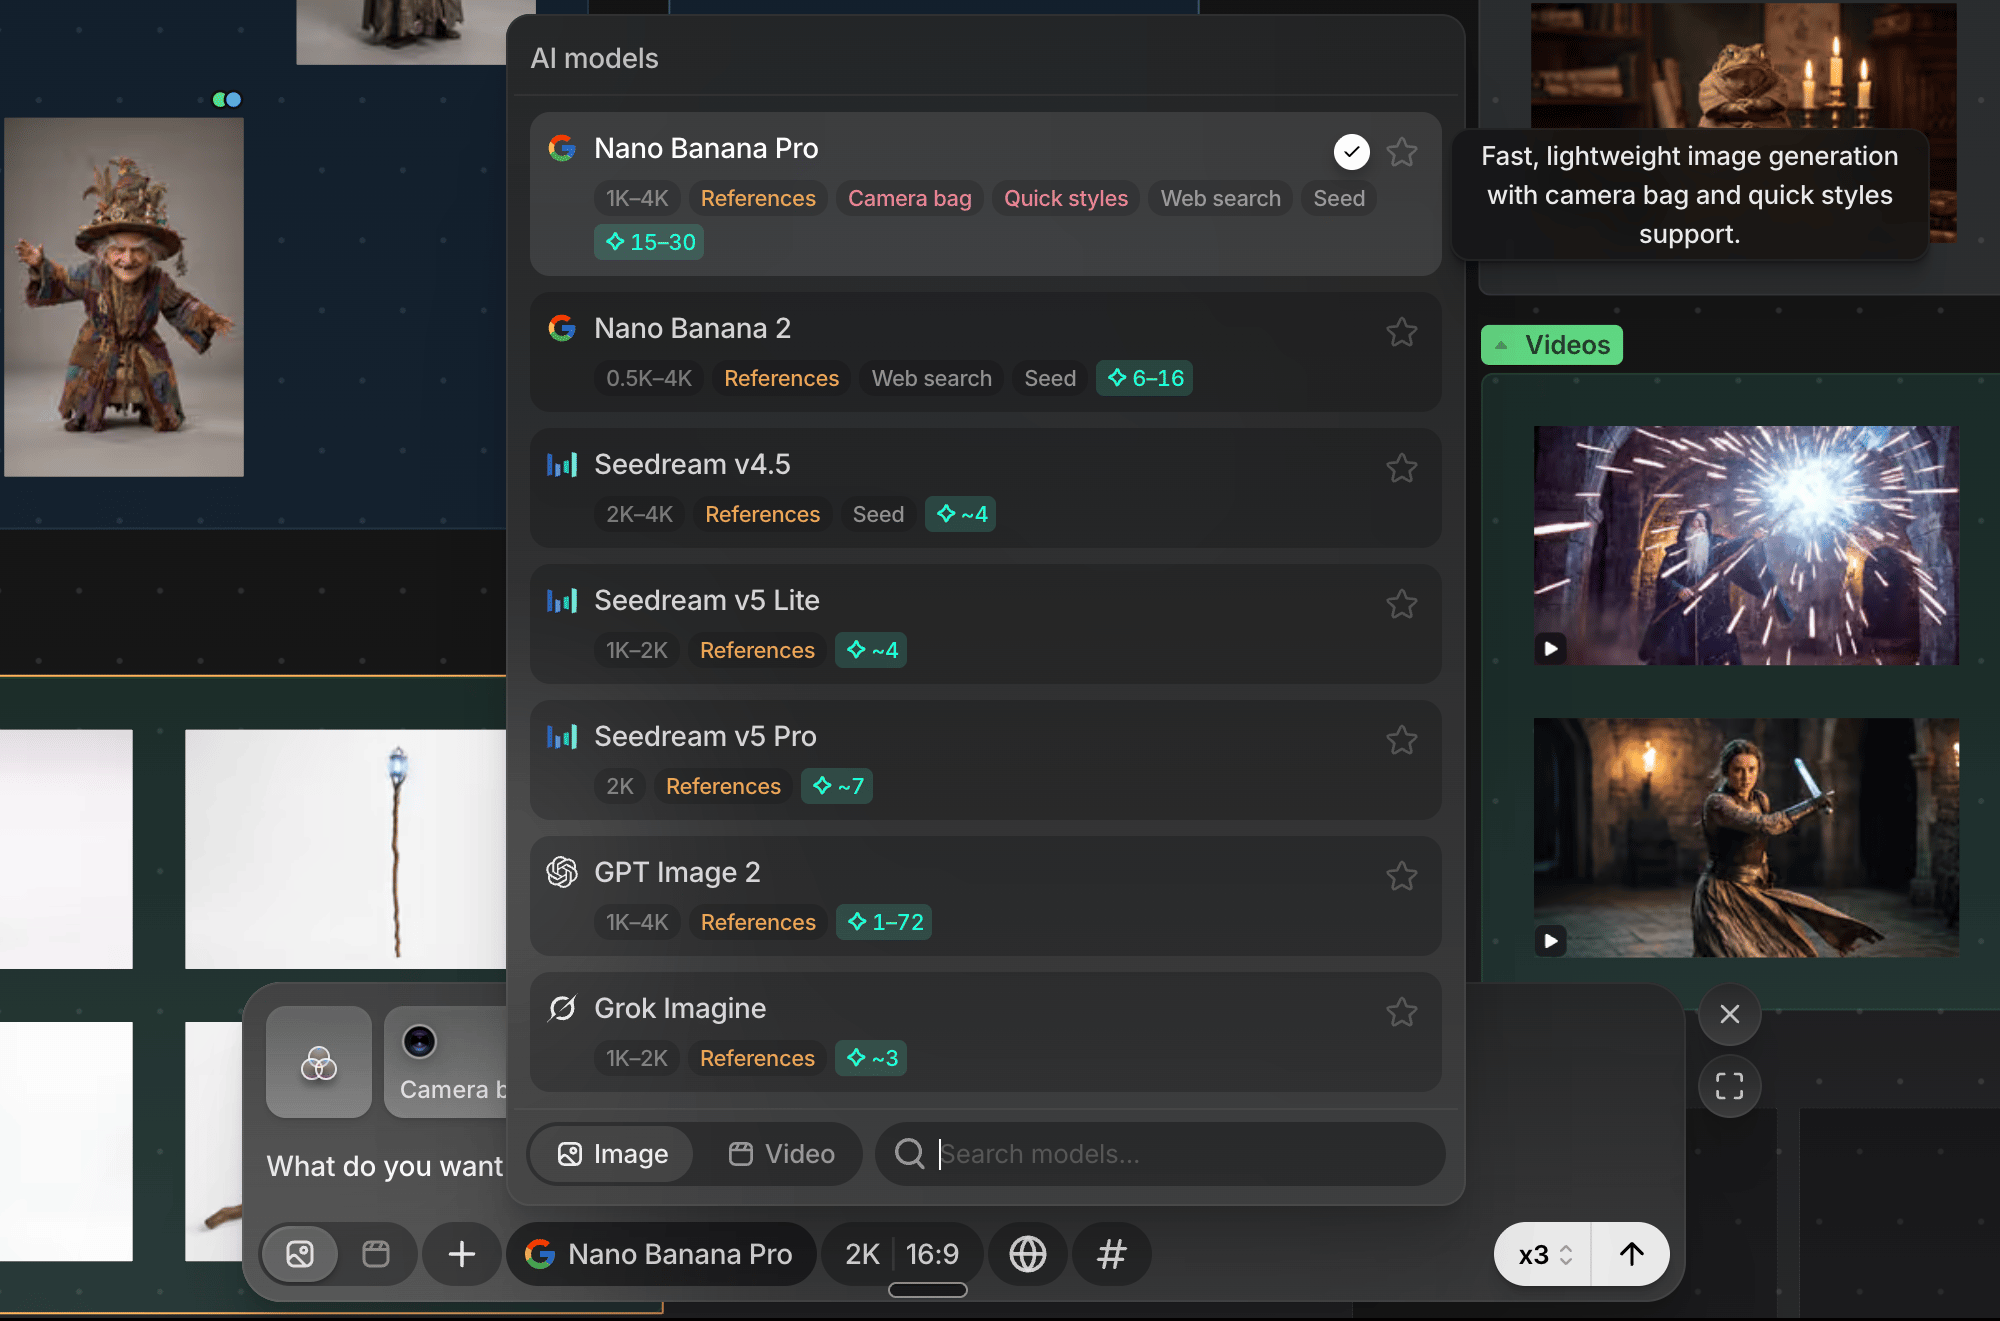
### Reading the model menu
* The grey number is the resolution the model can generate.
* Video models show more settings that affect generation cost, so choose carefully.
* Some models let you set Start and End Frame independently; others require a Start Frame before you can add an End Frame.
Write a prompt in the prompt box at the bottom of the canvas, then set:
* Model
* Resolution and aspect ratio
* Duration and audio on/off (video)
* Internet on/off
* Seed
* Number of outputs
Hover the generate button to check credit cost before running a job. See [Project Analytics](/preview/project-analytics).
### Reading the model menu
* The grey number is the resolution the model can generate.
* Video models show more settings that affect generation cost, so choose carefully.
* Some models let you set Start and End Frame independently; others require a Start Frame before you can add an End Frame.
 ### Negative Prompt
If supported, access Negative Prompt from the icon at the prompt box's lower right.
### Audio
If supported, toggle Audio from the speaker icon at the prompt box's bottom right.
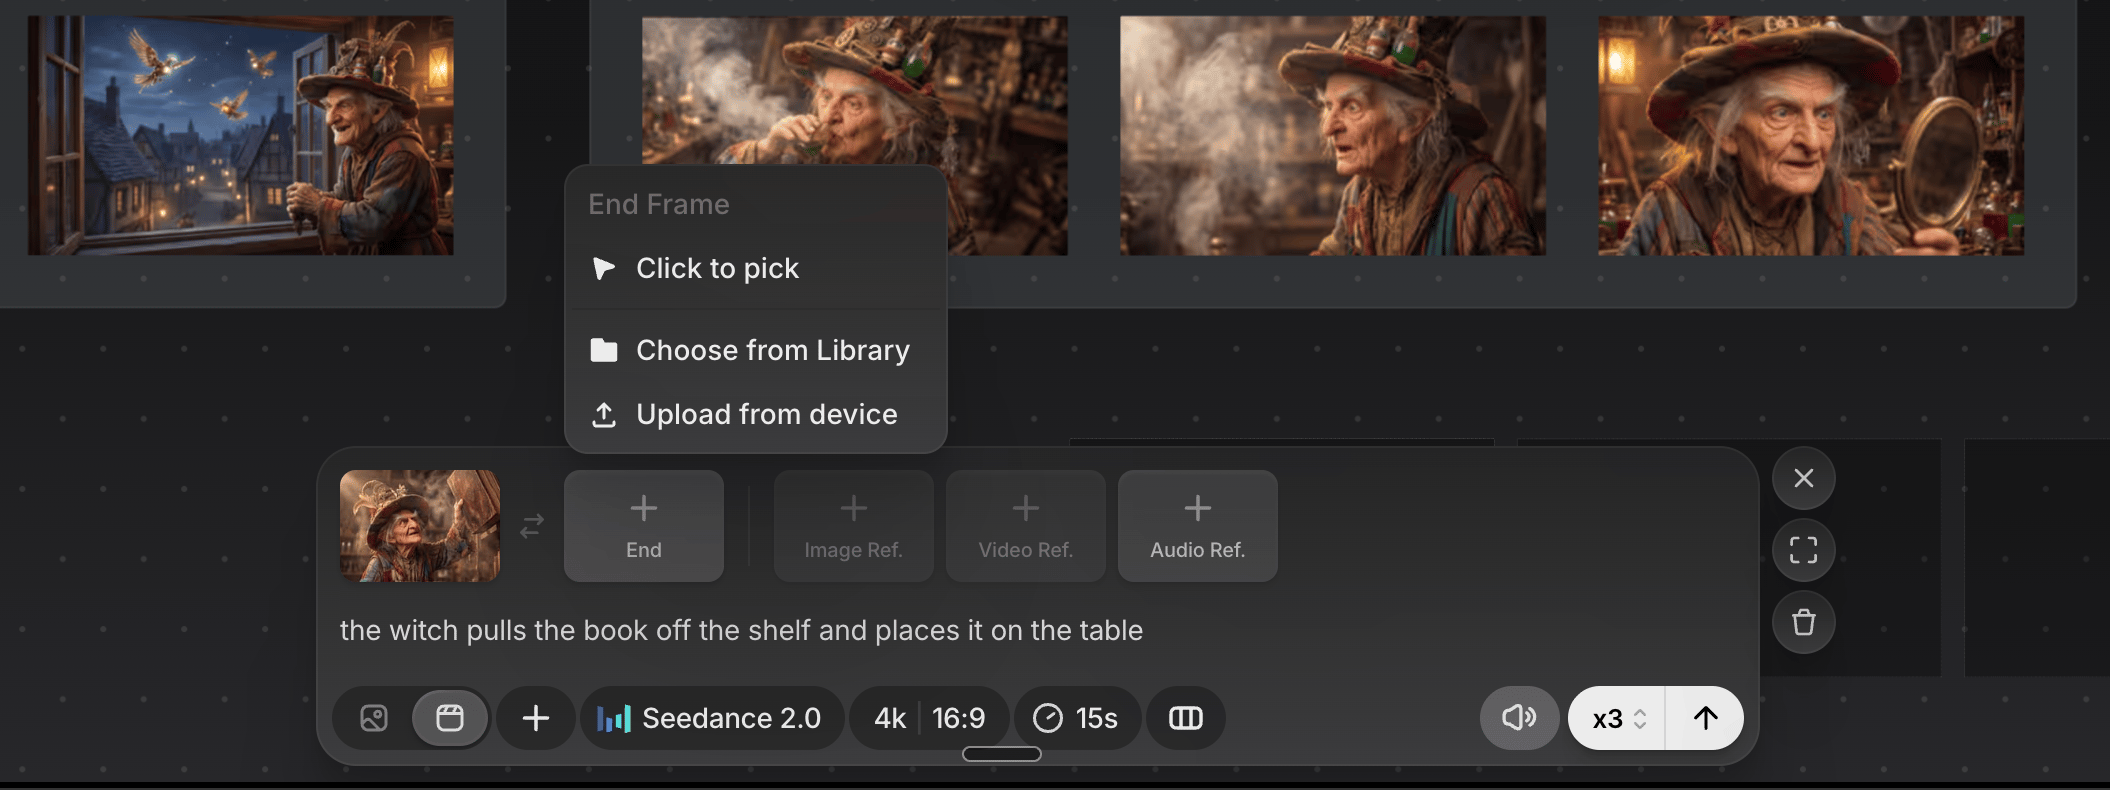
### Start and end frames (video)
Set a start or end frame four ways: Click to Pick on the canvas, Choose from Library, Upload from Device, or the target icon on a canvas file.
### Negative Prompt
If supported, access Negative Prompt from the icon at the prompt box's lower right.
### Audio
If supported, toggle Audio from the speaker icon at the prompt box's bottom right.
### Start and end frames (video)
Set a start or end frame four ways: Click to Pick on the canvas, Choose from Library, Upload from Device, or the target icon on a canvas file.
 ## Add references
Type `@` to open the reference menu: Recently used, Gen History, Uploads, and your library by category (Characters, Locations, Props, including specific variations). Pick something and it appears in the prompt box as a chip. See [Referencing with @](/preview/at-references) for the full menu.
Each model has its own reference limit, shown beside the ref box in the prompt box's top bar. Some video models also accept video references, sourced the same way. Location references are interpreted literally; for a specific angle, generate that angle first and reference the new image.
## Next steps
* [Quick styles and Camera Bag](/preview/quick-styles) for reusable visual treatments.
* [Sequence Timeline](/preview/scene-timeline) to turn files into structured shots.
* [File Toolbar](/preview/file-toolbar) for what you can do with a file on canvas.
## Add references
Type `@` to open the reference menu: Recently used, Gen History, Uploads, and your library by category (Characters, Locations, Props, including specific variations). Pick something and it appears in the prompt box as a chip. See [Referencing with @](/preview/at-references) for the full menu.
Each model has its own reference limit, shown beside the ref box in the prompt box's top bar. Some video models also accept video references, sourced the same way. Location references are interpreted literally; for a specific angle, generate that angle first and reference the new image.
## Next steps
* [Quick styles and Camera Bag](/preview/quick-styles) for reusable visual treatments.
* [Sequence Timeline](/preview/scene-timeline) to turn files into structured shots.
* [File Toolbar](/preview/file-toolbar) for what you can do with a file on canvas.