> ## Documentation Index
> Fetch the complete documentation index at: https://docs.preview.io/llms.txt
> Use this file to discover all available pages before exploring further.
# Project Library
> Save and reuse characters, props, and locations, plus general files that don't fit a category.
Save an image to the library once, then reference it with `@` by name in any later prompt. This is how Preview keeps consistency across a project.
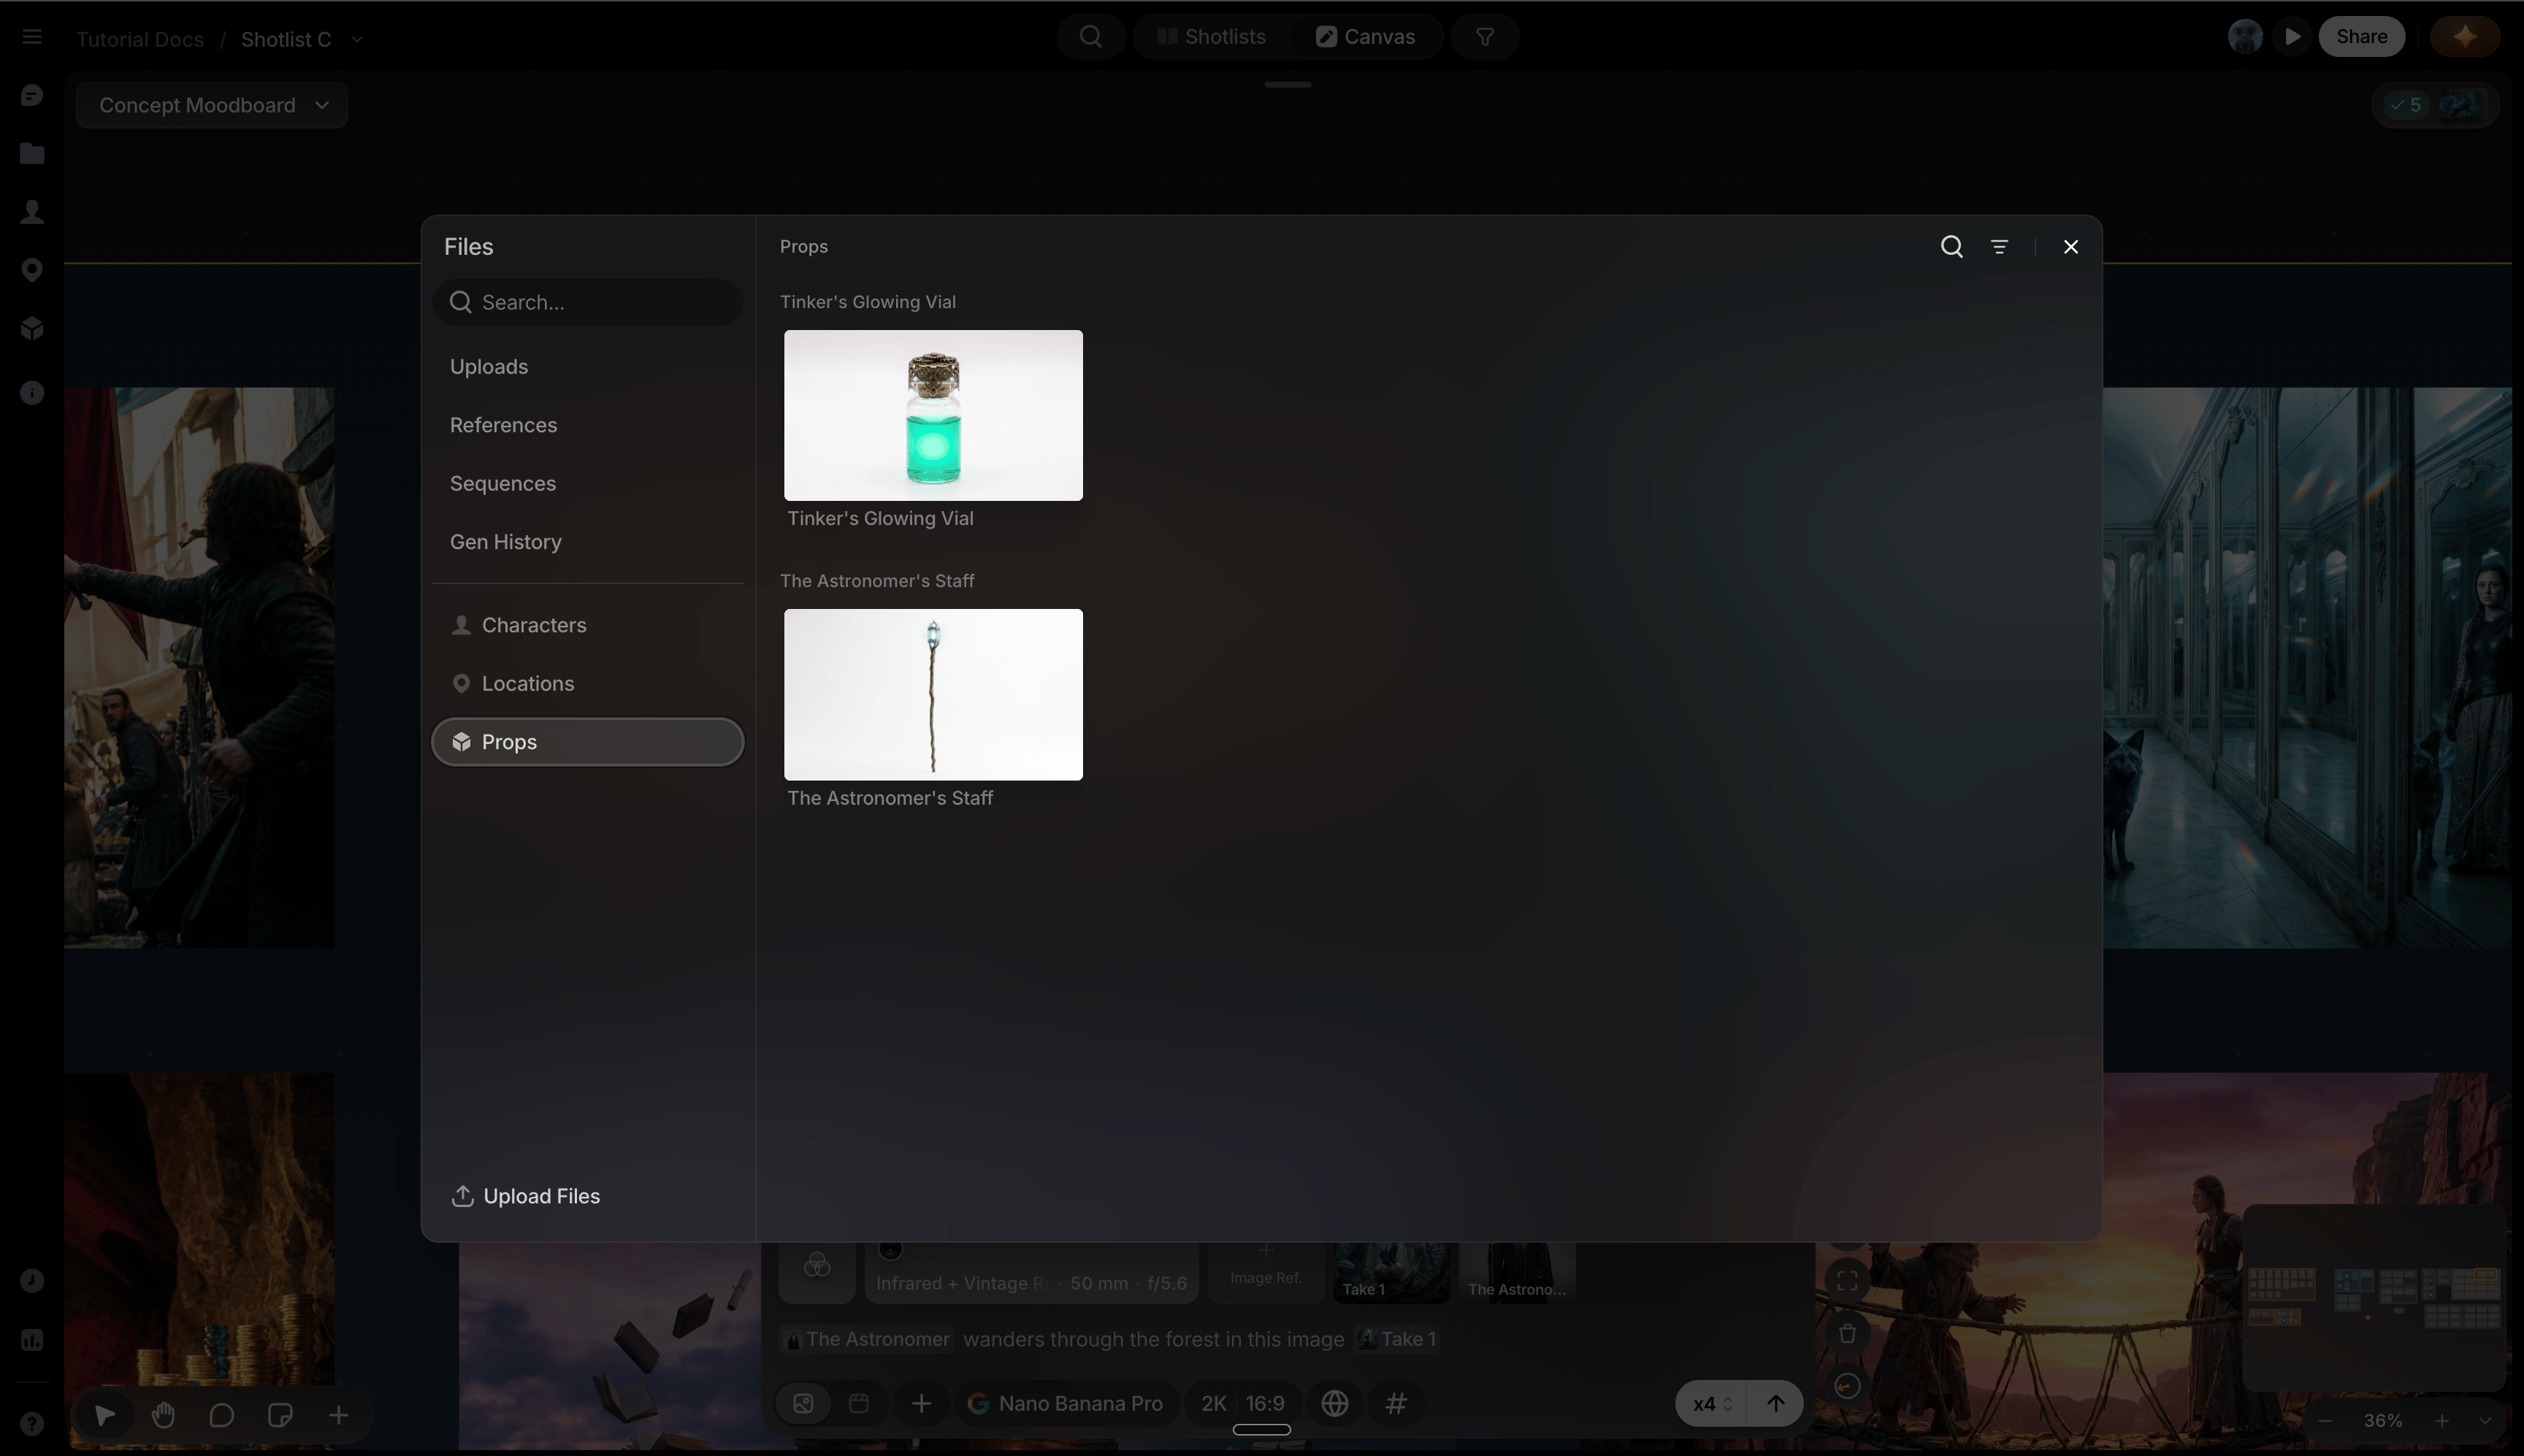 You'll also run into the library from inside reference pickers elsewhere in the app: choosing a Start or End Frame in the prompt box, for example, offers **Choose from Library** alongside Click to Pick and Upload from Device.
## Library categories
Each category lives in its own panel on the left sidebar. Click its icon to switch:
A reusable person or creature
A reusable object
A reusable environment
Uploads and other files not tied to a category
## Save to the library
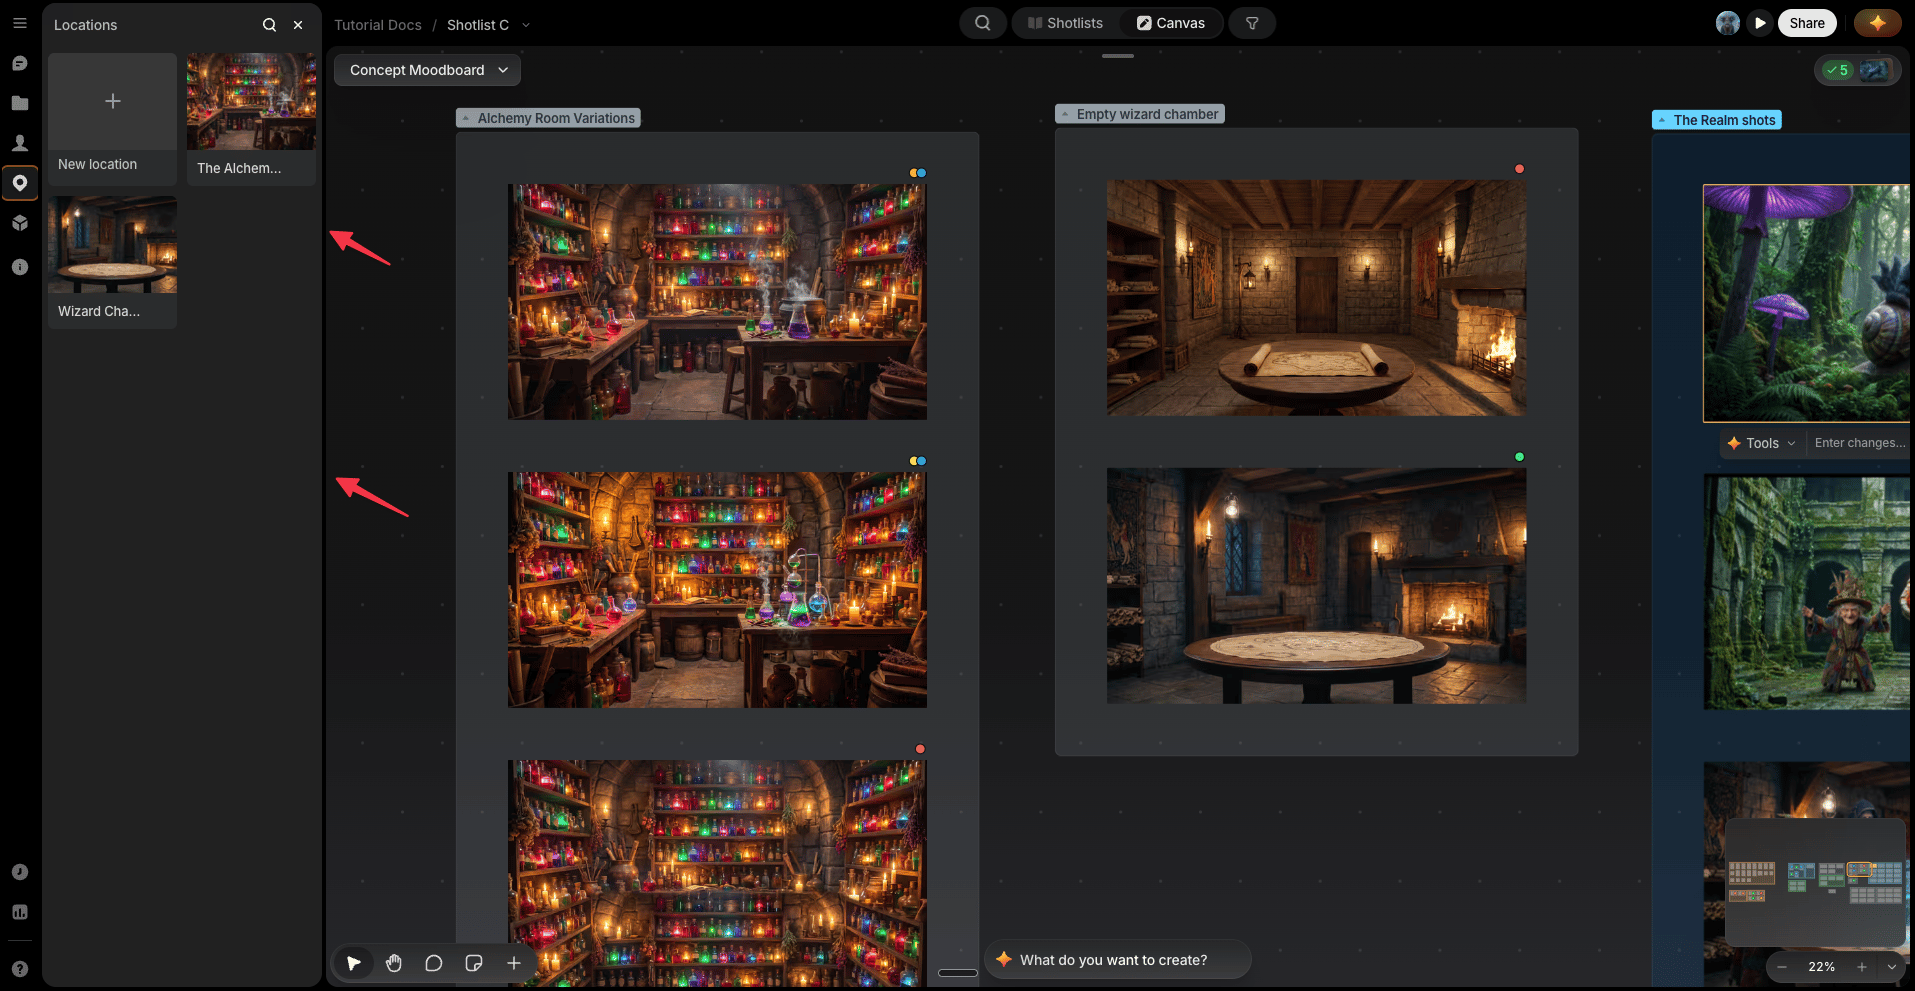
Right-click an image on canvas, use its three-dot menu, or open the Characters, Props, or Locations panel and create a new entry.
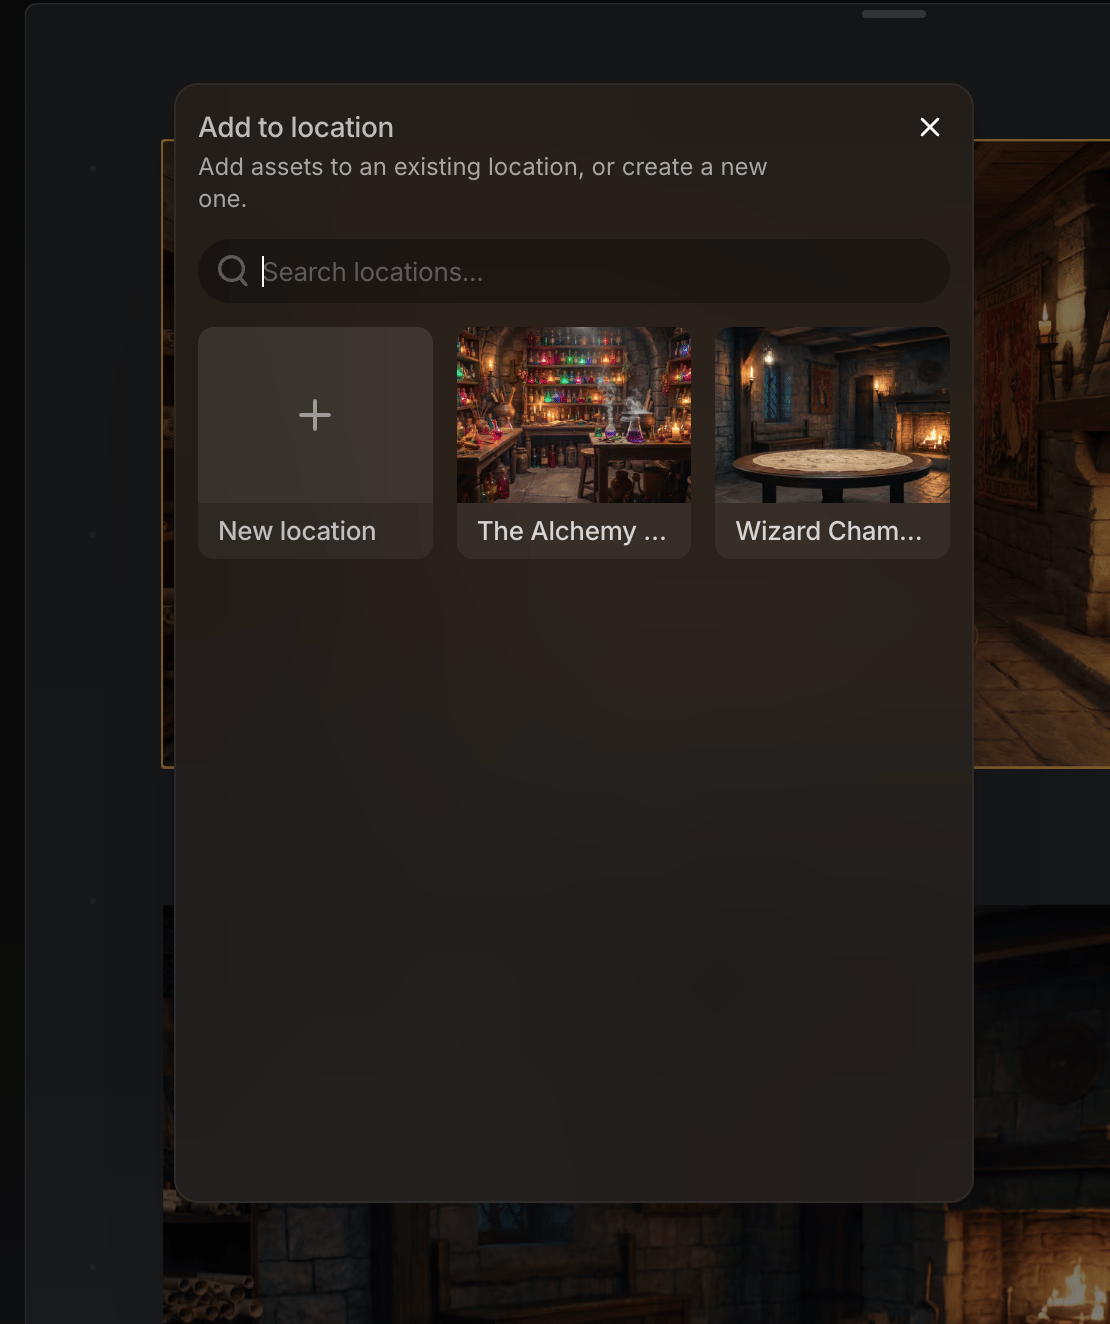
Pick Character, Prop, or Location, then assign the image to an existing entry or create one with a name and description.
Upload extra angles into the entry. More views usually improve later consistency.
## Characters
A reusable person or creature you'll generate repeatedly. Saving one keeps their appearance consistent across every shot and sequence they show up in, and makes them referenceable by name anywhere in the project.
Use clear, single-character images on a blank or white background. Background elements can bleed into later outputs. Multi-angle sources usually give more consistent results than one narrow view.
## Locations
A reusable environment or set. Saving one lets you return to the same place across multiple shots without re-describing it every time, and to generate new angles of it later.
Save environment-first images with no characters, people, or creatures in frame. Include only elements you want to influence future generations. For important sets, save a range of views: wide establishing shots and specific angles both aid continuity.
## Props
A reusable object (a weapon, vehicle, or piece of set dressing) that needs to look the same wherever it appears.
Save the object isolated on a blank or white background. Background elements can bleed into later generations. Use several clean sources for important props so you can reference different angles later without inventing them.
## Variations
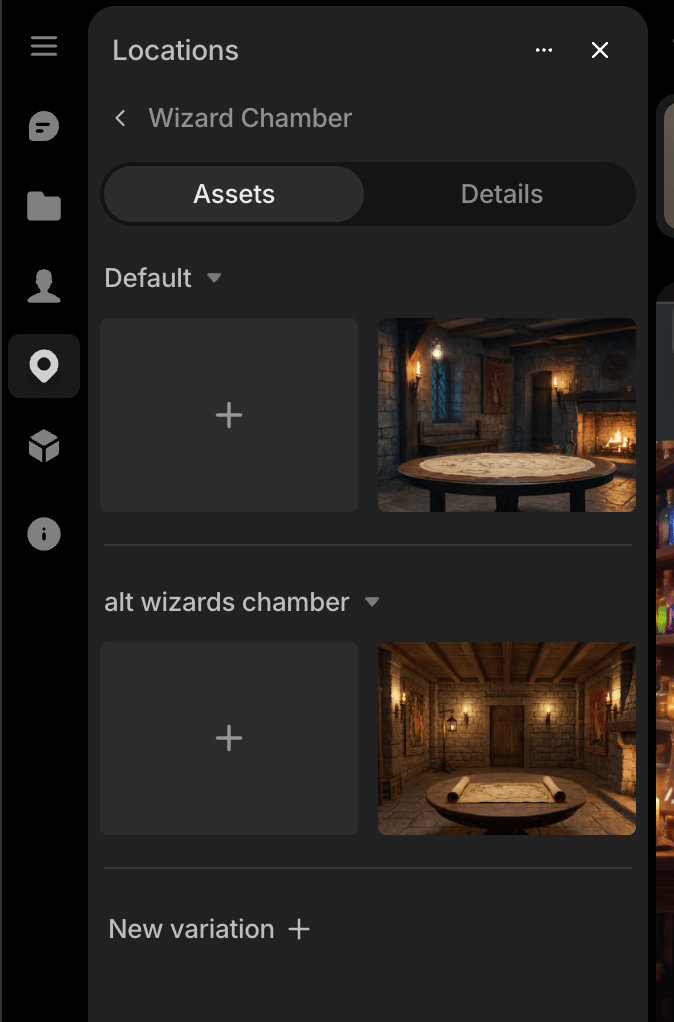
Give a Character, Location, or Prop multiple looks (a different outfit, time of day, or state) without a separate library entry for each. Every entry starts with one default variation; add more as needed.
* **Add a variation**: click **New variation** from the entry's sidebar panel or library page, or create one from the **Add to...** dialog when saving a canvas file.
* **Add images to a variation**: each keeps its own image set. Use its **Add asset** control, or drag an image onto another variation to move it there.
* **Rename or delete a variation**: from its **⋯** menu; the default variation can't be deleted.
* **Reference a variation**: type `@` and pick the entry; with more than one variation, you'll choose which before picking images.
Reserve variations for meaningful visual differences; add extra angles of the same look to a variation's existing set instead.
## Importing files
Bring anything from your computer, or from outside Preview, into the project: reference images, footage, or other material you want to use for any purpose, without needing a full library entry first.
Import files by:
* Dragging images from your desktop onto the canvas
* Right-clicking the canvas and choosing an upload option
* The **+** button in the canvas toolbar's bottom-left
* Uploading into a file folder from the sidebar
* Uploading directly from the prompt box or from Preview Agent
* Adding from Shotlists via a shot's upload or library options
Uploaded files join project history: drag them onto canvas, attach as prompt references, or reuse later by name.
You'll also run into the library from inside reference pickers elsewhere in the app: choosing a Start or End Frame in the prompt box, for example, offers **Choose from Library** alongside Click to Pick and Upload from Device.
## Library categories
Each category lives in its own panel on the left sidebar. Click its icon to switch:
A reusable person or creature
A reusable object
A reusable environment
Uploads and other files not tied to a category
## Save to the library
Right-click an image on canvas, use its three-dot menu, or open the Characters, Props, or Locations panel and create a new entry.
Pick Character, Prop, or Location, then assign the image to an existing entry or create one with a name and description.
Upload extra angles into the entry. More views usually improve later consistency.
## Characters
A reusable person or creature you'll generate repeatedly. Saving one keeps their appearance consistent across every shot and sequence they show up in, and makes them referenceable by name anywhere in the project.
Use clear, single-character images on a blank or white background. Background elements can bleed into later outputs. Multi-angle sources usually give more consistent results than one narrow view.
## Locations
A reusable environment or set. Saving one lets you return to the same place across multiple shots without re-describing it every time, and to generate new angles of it later.
Save environment-first images with no characters, people, or creatures in frame. Include only elements you want to influence future generations. For important sets, save a range of views: wide establishing shots and specific angles both aid continuity.
## Props
A reusable object (a weapon, vehicle, or piece of set dressing) that needs to look the same wherever it appears.
Save the object isolated on a blank or white background. Background elements can bleed into later generations. Use several clean sources for important props so you can reference different angles later without inventing them.
## Variations
Give a Character, Location, or Prop multiple looks (a different outfit, time of day, or state) without a separate library entry for each. Every entry starts with one default variation; add more as needed.
* **Add a variation**: click **New variation** from the entry's sidebar panel or library page, or create one from the **Add to...** dialog when saving a canvas file.
* **Add images to a variation**: each keeps its own image set. Use its **Add asset** control, or drag an image onto another variation to move it there.
* **Rename or delete a variation**: from its **⋯** menu; the default variation can't be deleted.
* **Reference a variation**: type `@` and pick the entry; with more than one variation, you'll choose which before picking images.
Reserve variations for meaningful visual differences; add extra angles of the same look to a variation's existing set instead.
## Importing files
Bring anything from your computer, or from outside Preview, into the project: reference images, footage, or other material you want to use for any purpose, without needing a full library entry first.
Import files by:
* Dragging images from your desktop onto the canvas
* Right-clicking the canvas and choosing an upload option
* The **+** button in the canvas toolbar's bottom-left
* Uploading into a file folder from the sidebar
* Uploading directly from the prompt box or from Preview Agent
* Adding from Shotlists via a shot's upload or library options
Uploaded files join project history: drag them onto canvas, attach as prompt references, or reuse later by name.